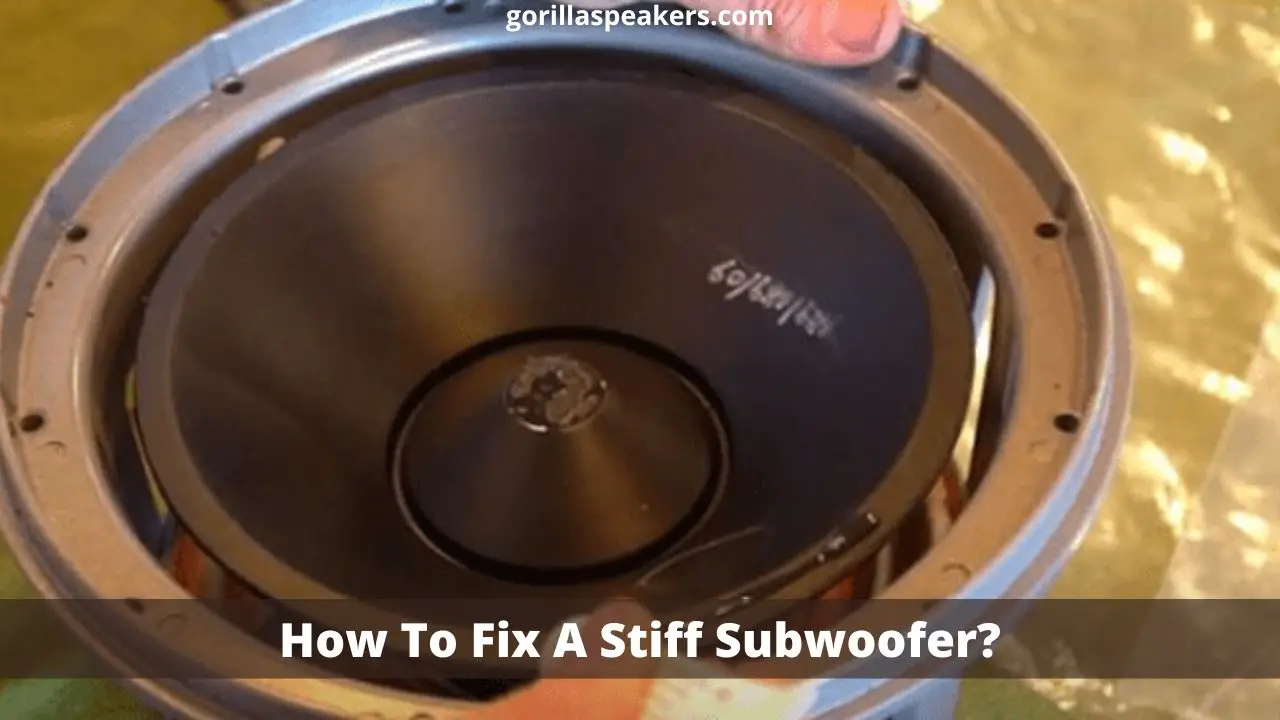
If you are experiencing irregular sound from your subwoofer, it indicates that your subwoofer has gone stiff and is most probably blown. If you exert a tiny bit of force on the subwoofer cone and it isn’t moving freely, then it means you have a stiff subwoofer.
There could be several causes for a subwoofer to become stiff. It is the most sensitive tool and can easily become stiff, especially if the subwoofer is of poor quality. Other causes of freezing include amplifier clipping, excessive coil heating, and suspension foam tearing.
Now the question is Can you fix your stiff subwoofer? Luckily for you, the answer is yes.
But it can only be done if you understand the fault and follow proper guidelines. Never try to tap the subwoofer in search of a quick fix because that will damage the sub even further.
So, let’s see how you can fix your subwoofer and get it to work again.
Why Is My Subwoofer Stiff?

The first thing that you are going to need to accomplish is to find out why your subwoofer has become stiff, and then you can move on to the fixing part.
The cone of a subwoofer is supposed to move up and down to process various bass sounds freely. To check for a stiff subwoofer, you need to put your thumbs on opposite sides of the subwoofer’s cone and apply an equal amount of pressure on both sides.
If the cone doesn’t move downwards and then back up, it means you have a frozen subwoofer.
Always keep in mind that you shouldn’t ever attempt applying too much pressure or repeatedly tap the cone to un-stuff it. You will end up destroying the cones and worsening the problem. So, what to do when you have identified that your subwoofer has gone stiff? You need to find out why it happened.
To answer the question, It can happen because of the following reasons:
Clipping
The most common reason for a blown subwoofer and, as a result, getting stiff is clipping. When too much signal is supplied to the audio amplifier, the audio signal voltages reach the amplifier’s power supply voltages, resulting in a clipped signal which damages the amplifier and the subwoofer.
A subwoofer gets severely damaged due to continuous clipping. If the sound gets deafening and oddly, it’s an indication that the subwoofer is clipped.
It usually happens because of low-quality amplifiers. High-quality amplifiers have in-built systems to prevent your amplifier and subwoofers from situations that cause clipping.
Overpowering Of Subwoofer
Most other times, the damage is caused because the heating limit of the subwoofer is exceeded, which causes the voice coils to melt. Overpowering your subwoofer all the Time is a recipe for disaster.
Occasionally it is ok if you want slash bam music at high levels, but turning that volume knob up too much regularly will not only distort the music and sound bad but will also damage your speakers and the subwoofer by overheating them beyond their designed working limit.
Another reason for your subwoofer freezing is that if you didn’t use a subsonic filter, it could cause unloading at very low frequencies making the subwoofer bottom out. The cone crashes into the voice coil, and the subwoofer gets stiff. Remember that your sub won’t stop working without reason.
There is always a reason behind the failure of your equipment. You must have heard, “Prevention is better than cure.” The best thing is to prevent the causes of the failure rather than going into damage repair.
Always try to use your subwoofer (and every other electrical equipment) below its maximum capacity and use the subsonic filter.
Some other reasons that can cause your subwoofer to go stiff are its Damaged suspension foam, Damaged cones, Melted or damaged voice coils
That is why use good quality amplifiers to increase the life of your subwoofers and also prevent failure. Luckily, there are solutions to fix these problems at home with a bit of time and effort.
So let’s find out how Fixing A Stiff Subwoofer Before beginning the therapy, you must determine the reason behind the sudden stiffness of your subwoofer.
In addition to this, keep in mind how serious the issue is. Most of the time, the problem is not severe and may be fixed at home on your own.
How To Fix A Stiff Subwoofer?
You can fix your stiff subwoofer by following the steps mentioned below. But, there are situations in which the subwoofer has suffered significant damage, and attempting to repair it at home could result in the emergence of further issues. In the circumstances like these, it is best to seek the assistance of an expert.
But still if you are repairing it yourself than, before commencing the process, you should first get the tools discussed below.
Tools Required
When you have decided to fix your subwoofer, the first thing to do is to gather all the necessary tools and accessories. To fix your subwoofer, you will require the tools listed in the following paragraphs.
- Screwdriver
- Small knife
- Masking tape
- Speaker repair glue
- Acetone
- Epoxy glue
- Elmer’s glue
- Solder iron
- Rubbing Alcohol
Since we have your attention, the next thing we will do is discuss the necessary tasks or actions that have to be carried out to fix your sluggish subwoofer.
Method 1: Detaching the Subwoofer
To remove the bolts that are attached to them, unscrew the screws and then remove the subwoofer from where it is mounted. A screwdriver is all you need to accomplish this task.
It will make it easier for you to detach the material and provide quick access to the area where the subwoofers are located.
It would be best if you continued with extreme caution since incorrectly unmounting something can cause damage to the wires that are attached to it. After that, detach each wire that is attached to the subwoofer.
After gently removing the subwoofer from its mounting point, the next step is to put it in place with adequate lighting so that an inspection of its defect can be made.
Your immediate attention at this time should be on locating the component that is malfunctioning. Whether the problem lies with the voice coil, the cone, or suspension foam, whichever comes first.
To clarify, if there is a problem with the suspension of the foam, the problem can be simply fixed with adhesive.
On the other hand, if the coil or cones have been damaged, you should try to cut them away with a knife. Remove them by cutting through the center of the dust cap. Make use of the little knife and attempt to cut the coil surrounding the spider.
Detaching the spider, which was previously linked to the coil, is a natural process. Because of this, it will emerge as a single unit as a result. At this point, you must replace the old coil with a new one and then reattach the tinsel to the terminals.
Be very careful, however, because to keep them from getting damaged once more throughout this process, you will require a solid iron.
Method 2: Comprises Fixing Your Item With Rip Glue.
The procedure entails fixing the tear in the subwoofer, which calls for using the specialized tear adhesive indicated earlier in the list of essential components.
Most people will try to fix it with a paper towel, a technique that is easy to implement but not very successful. Still, you can use a paper towel, but you have to peel away one of the layers if it has two or more.
Reduce the paper towel size to match the tear’s dimensions. Be sure that the cloth is large enough to cover the tear easily but not so large that it overwhelms the area that must be covered.
Put the paper towel into the hole created by the rip and firmly press on it. Verify there are no empty spaces in the structure , In the area surrounding the hole.
Elmer’s glue can be used to give it a firm hold and prevent it from toppling over. The glue shouldn’t be able to be seen as a thin liquid; instead, it should be saturated entirely all around the towel.
If you want to apply it again, you must first wait until it is dry. This is a straightforward process that, with the assistance of glue and paper towels, you can re-establish the connection between the fiber in torn subwoofers.
Method 3: Replacing The Suspension Foam:
You will need to repair your suspension foam if it has become so worn down that it restricts the movement of your subwoofer cone. This can happen if the foam is damaged to such an extent that it has become stiff.
Insert the knife from the toolkit in the space between the subwoofer frame and the gasket. To remove the gasket from the subwoofer, insert the knife a little farther and turn it around in a circle until the subwoofer has been turned completely around.
The gasket must be removed without causing any damage so it can be used again. Use a knife to scrape away any residue that is still present.
The adhesive on the frame will allow you to clean it. Remove the foam from the speaker frame by cutting it away from the frame while being careful not to damage the frame.
After the frame has been removed, you can clean up any debris left behind by scraping it through the knife in a careful manner. A thorough cleaning of the frame to remove any lingering particles should be performed using a little acetone applied to a paper towel.
After the frame has been thoroughly cleaned, apply adhesive in an even layer to the interior of the newly installed suspension foam. Put the component that has been glued over the frame, and then uniformly press it down on the frame to get it to settle.
Allow the adhesive to dry for one hour before proceeding. Apply one more coat of adhesive to the uppermost portion of the suspension foam, which is the location where the gasket is supposed to go.
Put the gasket in position on top of the adhesive layer, ensure it is aligned with the holes in the subwoofer frame, and apply pressure evenly all the way around. Again, it would help if you gave it an hour to dry completely.
Method 4: Repairing The Voice Coil
It’s possible that the voice coil just got stuck, which would be the simplest explanation for its symptoms. Try applying light pressure to the speaker cone and looking for any movement.
In that case, shine some light on the coil to determine whether or not it is misaligned. If the voice coil does not appear to be in the correct position, raise the subwoofer’s cone just a tiny bit and let it adjust itself.
Alternatively, you can make the necessary adjustments by moving it around manually. After making the necessary adjustments, give the subwoofer a brief test run before reinstalling it. If it isn’t functioning correctly, you should get ready for the possibility of a more serious issue.
Connect the voice coil to a multimeter and check the resistance if you still have doubts regarding the functionality of the voice coil. If there is no detectable resistance, the voice coil has been compromised and needs to be replaced.
Method 5: Repair By Reconnecting
If the suspension foam is not broken and the voice coil has been installed, you are still experiencing difficulties. If this is the case, the voice coil or the cone (or maybe both) are likely damaged and require replacement.
“Reckoning” refers to replacing these components one by one. When you re-cone the subwoofer, essentially all of the primary moving parts of a subwoofer, such as a cone, voice coils, and spider, are removed and replaced.
To replace these components, you will need to purchase a re-cone kit with all of the necessary components and some of the fundamental add-ons. The re-cone kit is not overly expensive but is also not overly inexpensive.
You will be required to do a great deal of study on the subject. Prices and decide for yourself regarding whether or not to invest your time and money in replacing these pieces or whether or not you believe it would be more cost-effective to replace the entire subwoofer.
If you have made the decision to become a subwoofer and have purchased the kit, the first thing you need to do is take out the components that are broken.
To accomplish this, you will first need to remove the gasket and the suspension foam by following the procedure described earlier in the article.
After that, use the knife to cut off the spider and remove both the spider and the voice coil. Take off any leftover pieces of the adhesive, the gasket, the suspension foam, and any other debris still stuck to the frame.
Acetone should be used to clean the frame thoroughly, and any and all debris should be removed. A soldering iron should be used to connect the tinsel leads to the basket terminals once the new spider and voice coil has been carefully positioned in the correct location.
After that, insert the replacement cone in its original location, then use glue to secure the suspension foam and gaskets to the frame of the subwoofer.
Allow the subwoofer to rest for about an hour so that the adhesive can dry and the parts may become aligned. Keep it in mind, It would be best if you did not immediately begin operating the subwoofer at full throttle once you have reckoned it.
After allowing it to stabilize at the medium bass levels for a while, you can progressively increase the sound volume. That wraps up our discussion. Your subwoofer is now active and producing sound.
Method 6: Reinstall The Software
It is Time to reinstall the subwoofers if nothing else is working and you cannot determine what is causing the device to freeze up in the first place. To get started with the technique:
- Get a screwdriver, and unscrew the equipment.
- Change out the subwoofer in the system.
- Be cautious of the wires that are all about you, as was previously said. The handbook with the device can be used to figure out where the wires are located and how they should be connected.
The subs and wiring in the system need to be replaced. If the issue is not resolved after performing these procedures, it is strongly suggested that you seek assistance from a qualified specialist.
How To Troubleshoot Your Subwoofer When You’re Experiencing Problems With It?
Subwoofers are essential to any high-quality home theater system because they deliver the low-frequency bass that brings the action in movies and music to life.
On the other hand, subwoofers are susceptible to various issues, some of which can lower their output while others can render them completely inoperable.
Suppose you are experiencing issues with your subwoofer. In that case, the following troubleshooting steps may be able to be of assistance to you in identifying the specifics of the issue and getting the subwoofer back up and running.
In the beginning, it is necessary to inspect each connection to guarantee that it is protected. look for any indications of wear and tear on the subwoofer unit itself.
Review the owner’s manual that came with your subwoofer to see whether or not there are any particular troubleshooting actions that you need to carry out.
You should be able to get your subwoofer back up, and running takes almost no time if you just stick to these few simple guidelines.
FAQ’s
What Happens If A Subwoofer Fails?
Due to specific, relatively minor faults, the subwoofer does not spontaneously blow up. The issue brought on by feeding a significant volume of signal to the amplifier is typically brought about as a result of prolonged neglect.
As a direct consequence of this, clipping occurs, resulting in the coil overheating. Continuous clipping will eventually cause irreparable harm to the amplifier if it is allowed to continue.
Resultantly, the subwoofer dies. A blown subwoofer can be identified by its loud and poor sound quality.
Do Subwoofers Degrade Over Time?
Subwoofers are electronic devices that experience wear and tear after prolonged operation. When utilized regularly, the amplifier already integrated into the device may start making loud and odd noises irritating the hearing.
In the same vein, the driver is another component of a subwoofer that is prone to damage and must perform the appropriate maintenance. Most subwoofers have a lifespan of between 5 and 8 years, after which point they should be changed to ensure optimal performance.
What Should You Do If Your Subwoofer’s Coil Becomes Stuck?
Uncoiling it methodically with a knife will help you fix the problem. However, the process is very intricate, and even a slight mistake might result in the speaker not passing the test.
Keep in mind that squeezing the subwoofer in an attempt to unfreeze it will cause the cones to become damaged. Instead, use the flashlight to evaluate the situation, and if the wires surrounding the coil are not damaged, rearrange the coil so that it is in the position it was in before.
After that, check out the performance of the subwoofers on both sides. If, on the other hand, the wires are damaged, it is strongly recommended that you, Instead of attempting to do it yourself, it is best to seek the aid of a professional. to fix the device on your own.
Can A Subwoofer Get Frozen?
The vast majority of subwoofers are constructed using non-freezing materials. Unless the temperature drops below zero by a few degrees.
It does have to get extremely cold for your subs to stop working, but the fact that it is so cold is also a good thing since it keeps everything cold and prevents your subwoofer from getting heated.
Is It Possible To Repair A Blown Subwoofer?
A blown subwoofer can be repaired, especially if the cone is only partially blown out, so the answer is yes, there will be many challenges ahead of us.
A lot of difficulties in replacing a voice coil that has been damaged. Investing in a brand-new subwoofer can be the most effective course of action, depending on the nature of the issue.
Do Subwoofers Get Louder With Use?
The volume of a subwoofer should not increase as it gets older. Instead, they will make adjustments to the various frequencies that are offered and play the sounds that are transmitted most accurately feasible.
Why Is My Subwoofer Making A Rattling Noise?
For instance, if the problem is mechanical, the vibrating rattle may be caused by a loose fitting for the actual driver. This could also be the case, If the problem is electrical, the capacitors on the power supply rails of the amp may be broken.
Check the printed circuit board for any components that appear to be heat stressed and any capacitors that are bulging or leaking.
What’s The Deal With My Subwoofer Not Working?
Examine the subwoofer’s output to determine whether or not it has also been lowered. If the input device includes choices for the size of the speaker, choose the option with the smallest possible size first.
Changing the size of the speaker might sometimes cause the subwoofer to stop receiving a signal.
Conclusion:
Keep in mind that regardless of the piece of technology you are utilizing, you should always keep it working at a mild level until it is vital.
Never overwhelm or overuse your subwoofers; always operate them at their utmost potential because doing so will eventually fail, wasting time and money.
If something goes wrong, you shouldn’t rush into deciding because you could make an issue that was previously manageable much worse.
If you can’t find an expert to help you, your best bet is to get as much information as possible and stick precisely to the instructions if you wish to fix it yourself.
Conducting thorough research into the various monetary issues is the single most critical step. Create estimates for how much it will cost to do the necessary repairs, and compare those estimates to the amount it will cost to buy a brand new subwoofer.
The next step is to determine whether it is worthwhile to spend that much time and money repairing the subwoofer or whether it would be more cost-effective to replace it.